How it works
AI Reserve supports keyless access for Claude Desktop. Instead of an API key, Claude Desktop is pointed at the AI Reserve gateway with a small settings file, and each person signs in with their work Google account the first time they use it. From then on:
No API keys
There is nothing to issue, embed, rotate, or accidentally commit. Identity comes from the Google sign-in, brokered through AI Reserve's sign-in service.
Admin-controlled access
Only Google accounts that an admin has added to the AI Reserve portal can use the gateway. Anyone else completes the sign-in and then gets an access error.
One bill, per-user attribution
All Claude Desktop spend draws from the organization's AI Reserve wallet, and every request is attributed to the individual user in usage reporting.
Fast offboarding
Deactivate a user in the portal and their Claude Desktop access ends within about 10 minutes — no key revocation, no device visit.
For enterprise admins — rolling it out
If you hold the enterprise admin role in the AI Reserve portal, you manage your organization's users, see per-user usage, and control spend — all Claude Desktop traffic bills to your organization's AI Reserve wallet. A rollout has four parts: add your users, distribute the settings file, watch usage, and offboard people when they leave.
Adding users
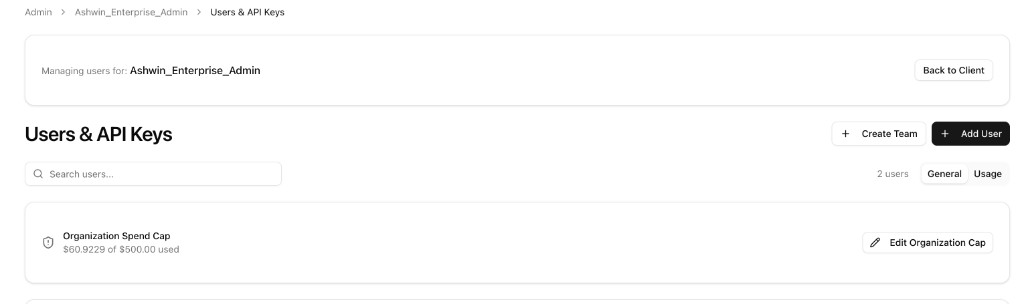
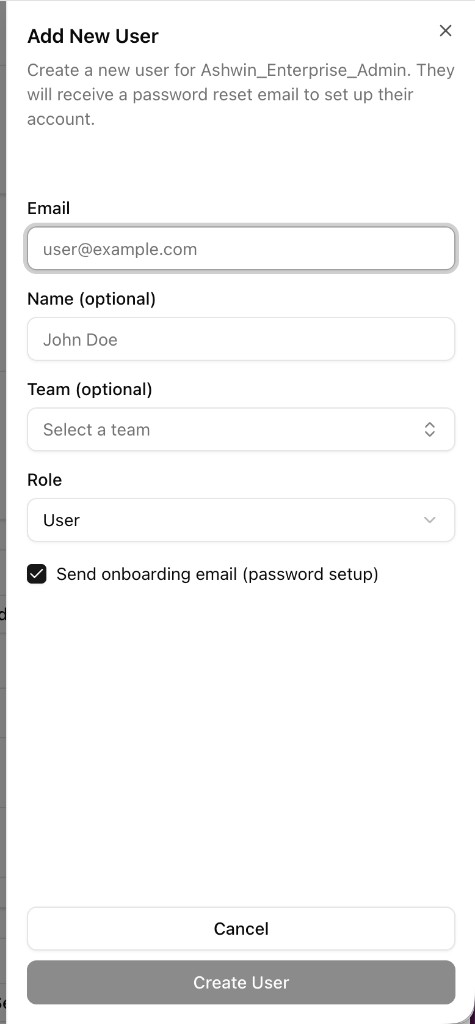
Access is controlled entirely by the portal's user list. Adding a user is the permission — the moment a user record exists for someone's work Google account, their Claude Desktop sign-in works. There is no separate invitation email they must accept and no per-user key to hand out.
Add users from your organization's user management area in the AI Reserve portal using their work Google email address. Anyone not on the list can still complete the Google sign-in screen, but the gateway will refuse their requests with an access error.
Distributing the settings file
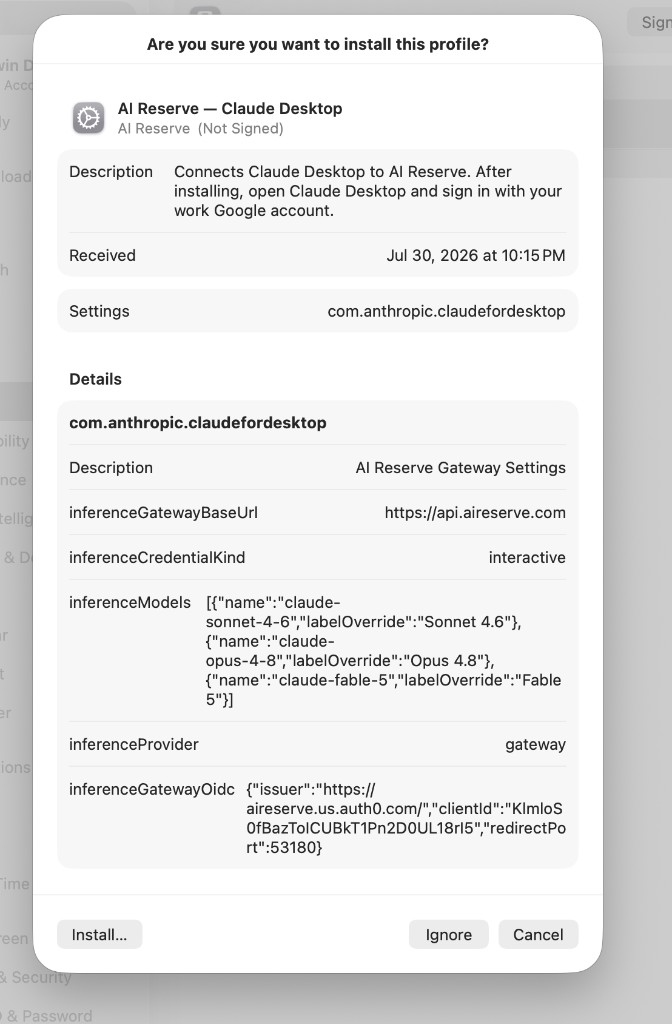
Claude Desktop learns where the AI Reserve gateway lives from a small, static settings file. It contains no secrets — just the gateway URL and sign-in configuration (see Configuration values) — so it is safe to email, drop in a shared drive, or push over MDM.
Ready-made files are on the portal's Connect page:
| Platform | File | What it does |
|---|---|---|
| macOS | aireserve-claude-desktop.mobileconfig |
Configuration profile that sets Claude Desktop's managed preferences — install by double-clicking, or deploy over MDM |
| Windows | aireserve-claude-desktop.reg |
Registry file that sets the same values under the Claude policy key |
For a handful of users, just send them the link to the Connect page along with the user setup steps below — each file installs with a couple of clicks. For a fleet, push it centrally:
MDM fleet deployment
The same settings can be deployed org-wide through your device management tooling, so users only have to install Claude Desktop and sign in:
-
macOS (Jamf, Kandji, Mosyle, Intune, …). Upload and scope the same
.mobileconfigprofile from the Connect page. It sets managed preferences in Claude Desktop's preference domaincom.anthropic.claudefordesktop. -
Windows (Intune, Group Policy, …). Deploy the values from the
.regfile toHKCU\SOFTWARE\Policies\Claudefor per-user policy, or the equivalent keys underHKLMfor machine-wide policy.
The exact keys and values are listed under Configuration values if you prefer to author the profile or policy in your own tooling.
Monitoring usage & spend
Claude Desktop traffic appears in the portal alongside API-key usage. As an enterprise admin you can see per-user usage for everyone in your organization; all of it draws from the organization's AI Reserve wallet, so budgets and spend reporting work exactly as they do for the rest of your gateway traffic.
Offboarding
To remove someone's access, deactivate the user in the portal. Their Claude Desktop access ends within about 10 minutes — the short delay is the gateway's token cache draining. There are no keys to revoke and nothing to uninstall from their machine.
For users — setup in 3 steps
You need your work Google account and about five minutes. If anything fails, see Troubleshooting below.
1. Install Claude Desktop
Download Claude Desktop from claude.com/download and install it — make sure to choose the macOS or Windows installer that matches your computer. You need version 1.6889.0 or later — if you installed it a while ago, update it first (the version is shown in the app's About screen).
2. Add the AI Reserve settings
The settings contain no secrets — they just tell Claude Desktop to use the AI Reserve gateway and to sign you in with Google. The steps differ by platform.
macOS
- Download
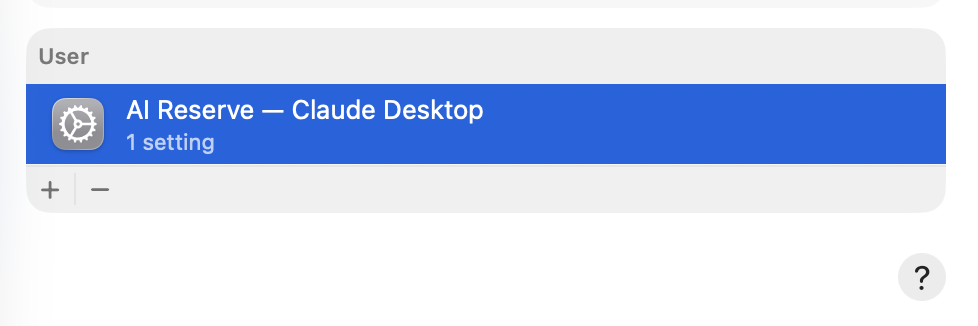
aireserve-claude-desktop.mobileconfigfrom the Connect page. - Open the downloaded file (double-click it). macOS will note that a profile was downloaded.
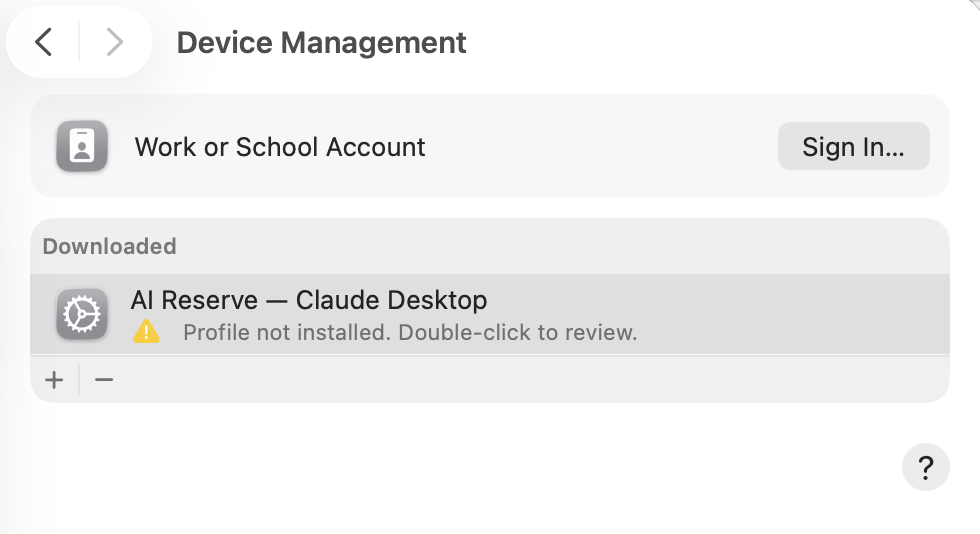
- Open System Settings → General → Device Management, select the AI Reserve profile, and click Install.
- Fully quit and relaunch Claude Desktop.
Windows
- Download
aireserve-claude-desktop.regfrom the Connect page. - Double-click the file. Windows shows a security warning first — that's expected (see the note below) — choose Run, then Yes to confirm adding the settings to the registry.
- Fully quit and relaunch Claude Desktop — the settings load on startup.
.reg files are plain text, so they can't carry the digital signature Windows
looks for. Want to check the file before running it? Open it in Notepad (right-click
→ Open with) — it's a few readable lines, the same
values documented below. Then choose Run to
continue, or use the no-download setup instead:
Prefer not to run a downloaded file? Paste the settings in instead — same result, no download and no warning.
Open Command Prompt (press the Windows key, type cmd,
press Enter) and paste all five lines below together, then press
Enter. If the window asks about pasting multiple lines, allow it. Each line
replies The operation completed successfully. Use Command Prompt, not
PowerShell — the lines are written for Command Prompt.
reg add "HKCU\SOFTWARE\Policies\Claude" /v inferenceProvider /t REG_SZ /d "gateway" /f
reg add "HKCU\SOFTWARE\Policies\Claude" /v inferenceGatewayBaseUrl /t REG_SZ /d "https://api.aireserve.com" /f
reg add "HKCU\SOFTWARE\Policies\Claude" /v inferenceCredentialKind /t REG_SZ /d "interactive" /f
reg add "HKCU\SOFTWARE\Policies\Claude" /v inferenceGatewayOidc /t REG_SZ /d "{\"issuer\":\"https://aireserve.us.auth0.com/\",\"clientId\":\"KlmloS0fBazToICUBkT1Pn2D0UL18rI5\",\"redirectPort\":53180}" /f
reg add "HKCU\SOFTWARE\Policies\Claude" /v inferenceModels /t REG_SZ /d "[{\"name\":\"claude-sonnet-4-6\",\"labelOverride\":\"Sonnet 4.6\"},{\"name\":\"claude-opus-4-8\",\"labelOverride\":\"Opus 4.8\"},{\"name\":\"claude-fable-5\",\"labelOverride\":\"Fable 5\"}]" /f
The commands set exactly the same values as the .reg file — nothing more.
When they finish, fully quit and relaunch Claude Desktop — the settings
load on startup.
3. Sign in with your work Google account
Launch Claude Desktop (restart it if it was already running). Instead of asking for a Claude.ai account, the welcome screen offers organization sign-in:
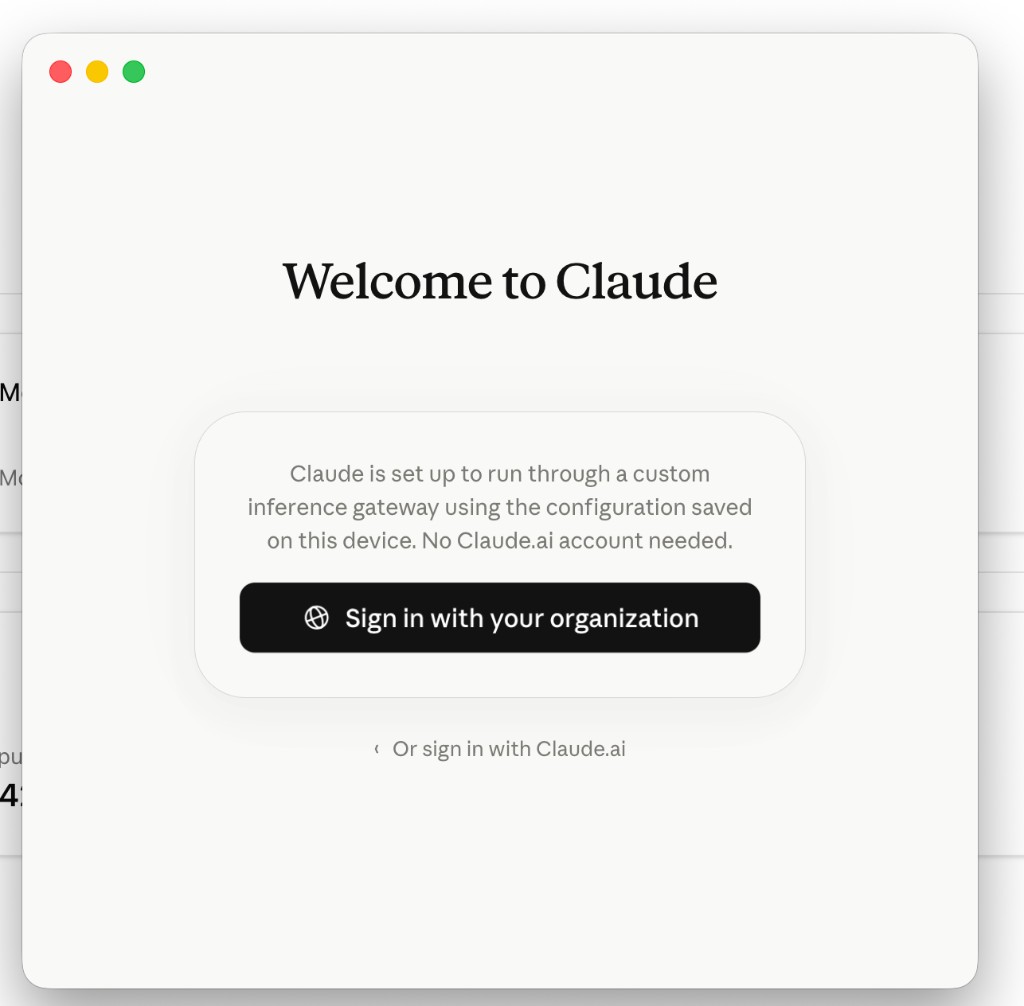
Click Sign in with your organization. Your browser opens — choose your work Google account, not a personal one, and authorize the app:
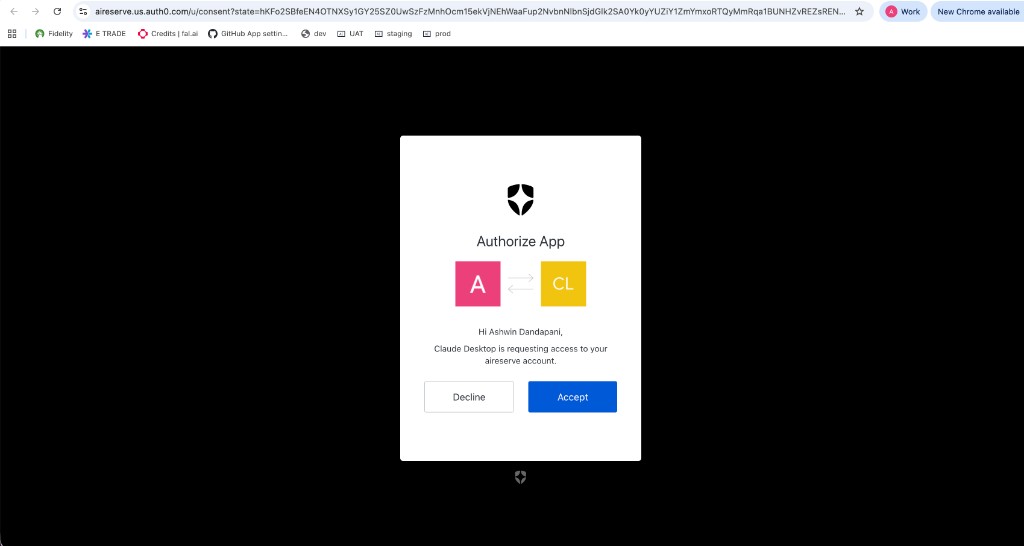
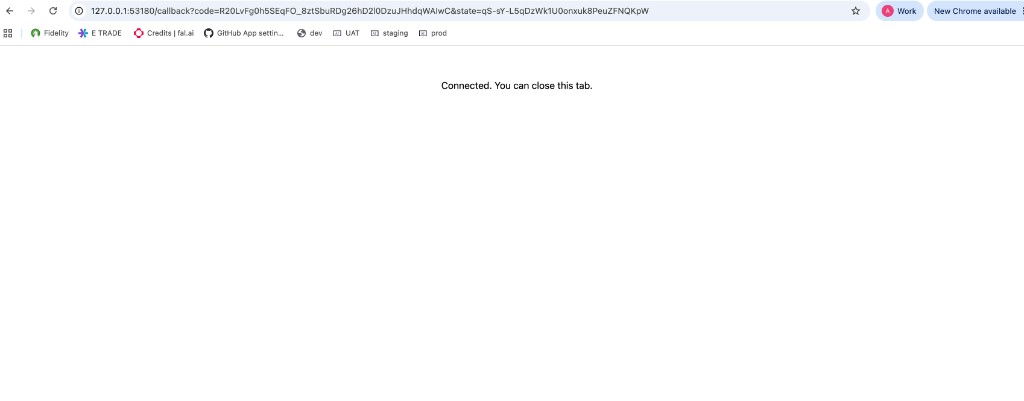
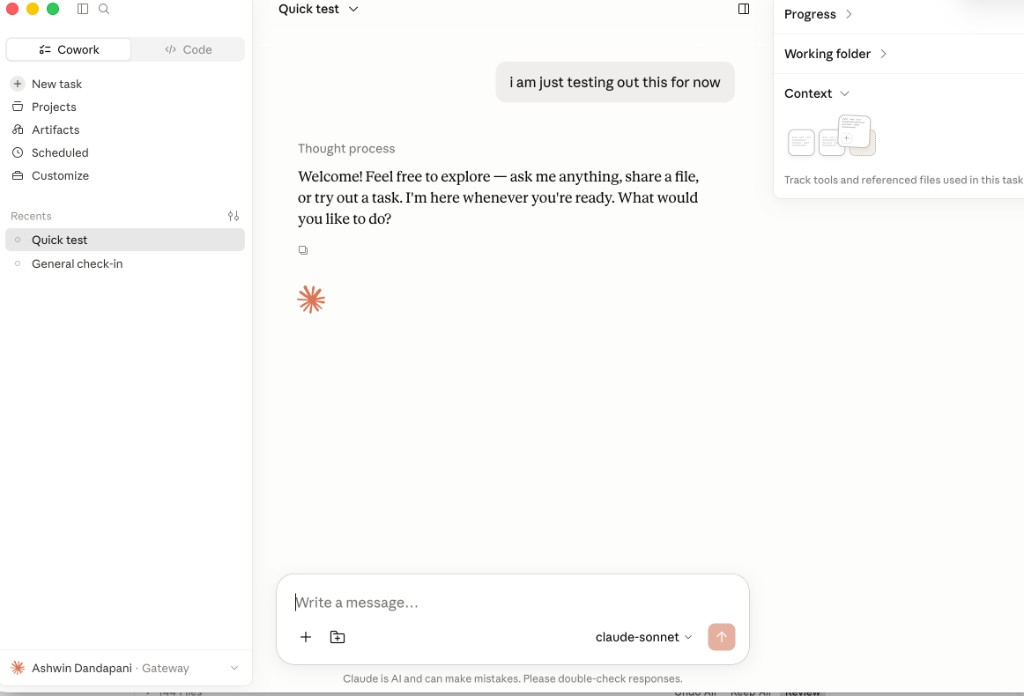
That's it: no API key, nothing else to configure. Your name appears in the bottom-left corner of the app with a “Gateway” badge, and everything you use is billed to your organization automatically:
Troubleshooting
| Symptom | Fix |
|---|---|
| Access denied after signing in | Your Google sign-in worked, but your account isn't (or is no longer) active in the AI Reserve portal. Ask your admin to add or reactivate your work account — the moment it's active, sign-in works with no further setup. |
| Picked the wrong Google account | If you signed in with a personal account by mistake, sign out inside Claude Desktop and sign in again, choosing your work account in the Google account picker. |
| Windows warns the publisher can't be verified | Expected for every downloaded registry file — .reg files are plain text and can't carry a digital signature, so Windows has nothing to verify. Choose Run to continue, or use the paste-in setup in step 2, which shows no warning at all. |
| No sign-in prompt / settings not applied | Make sure the settings from step 2 are actually in place (macOS: the profile shows under System Settings → General → Device Management — or, if you used the in-app setup, your values show under Developer → Configure Third-Party Inference; Windows: you confirmed the registry prompt or ran the five paste-in commands), then fully quit and relaunch Claude Desktop. |
| Claude Desktop version too old | Keyless sign-in requires version 1.6889.0 or later. Update from claude.com/download and try again. |
Configuration values
These are the exact values the Connect page files install. They contain no secrets — the OAuth client is public by design, and access is enforced server-side by the portal's user list — so they're safe to publish and to bake into MDM profiles.
| Claude Desktop setting | Value |
|---|---|
inferenceProvider |
gateway (activates third-party mode) |
inferenceGatewayBaseUrl |
https://api.aireserve.com |
inferenceCredentialKind |
interactive (sign in as yourself; no stored key) |
inferenceGatewayOidc |
JSON object — see below |
inferenceModels |
Pins the model picker to Sonnet 4.6 (default), Opus 4.8, and Fable 5 — mirrors the curated list on claude.ai instead of showing every raw alias |
The inferenceGatewayOidc value:
{
  "issuer": "https://aireserve.us.auth0.com/",
  "clientId": "KlmloS0fBazToICUBkT1Pn2D0UL18rI5",
  "redirectPort": 53180
}| Where the settings live | Location |
|---|---|
| macOS | Managed preferences in the com.anthropic.claudefordesktop preference domain (what the .mobileconfig profile sets) |
| Windows | HKCU\SOFTWARE\Policies\Claude (per-user), or the equivalent under HKLM for machine-wide policy |
The sign-in flow uses a local redirect on port 53180, so the browser must be
able to reach localhost:53180 during sign-in (this is standard for desktop
OIDC sign-ins and needs no inbound firewall rule).
Building API integrations too? The full gateway documentation — SDKs, wire formats, and the Code CLI — lives in the developer documentation.